-
Inspiracje
- Najnowsze
- Najpopularniejsze
- Zaskocz mnie
- Obserwowane
- MAGazyn
- Moda damska
- DIY - zrób to sam
- Kuchnia
- Uroda
- Wnętrza
- Humor
- Ogród
- Ślub
- Architektura
- Biżuteria
- Design
- Dziecko
- Film
- Fotografia
- Gadżety
- Historia
- Hobby
- Inne
- Książka
- Moda męska
- Muzyka
- Nauka i natura
- Plakaty i obrazy
- Podróże i miejsca
- Samochody i motocykle
- Sport i fitness
- Święta i uroczystości
- Tatuaż
- Zwierzęta
- Partnerzy
- KONKURS
-
Zakupy
-
ONA
- Ubrania
- Bielizna
- Bluzki
- Bluzy
- Dresy damskie
- Kombinezony
- Koszule
- Koszulki
- Kurtki
- Płaszcze
- Spodnie i leginsy
- Spodnie jeans
- Spódnice
- Stroje kąpielowe
- Sukienki i tuniki
- Swetry
- Szorty
- Zestawy
- Żakiety i kamizelki
- Buty
- Baleriny
- Botki
- Czółenka
- Espadryle
- Glany
- Japonki
- Kalosze
- Klapki
- Koturny
- Kowbojki
- Kozaki
- Obuwie Domowe
- Półbuty
- Sandały
- Sportowe i lifestyle
- Szpilki
- Tenisówki i Trampki
- Trapery i trekkingi
- Dodatki
- Bransoletki i zawieszki
- Breloki
- Czapki i kapelusze
- Etui
- Kolczyki, nausznice
- Kołnierzyki
- Kosmetyczki
- Naszyjniki, kolie i zawieszki
- Okulary
- Ozdoby do włosów
- Parasole
- Paski
- Pierścionki
- Plecaki
- Portfele
- Rękawiczki
- Skarpety
- Szaliki i chusty
- Torby i torebki
- Walizki
- Zegarki
- Zestawy biżuterii
- Zdrowie i uroda
- Akcesoria kosmetyczne
- Balsamy
- Bazy i podkłady
- Cienie do oczu
- Dezodoranty
- Higiena jamy ustnej
- Korektory
- Kredki
- Kremy i serum
- Lakiery
- Manicure i pedicure
- Maseczki
- Odżywki
- Peeling
- Perfumy i wody perfumowane
- Pielęgnacja po opalaniu
- Płyny żele i mydła
- Pomadki i błyszczyki
- Pudry
- Róże
- Stylizacja włosów
- Szampony
- Toniki i demakijaż
- Tusze
- Wody toaletowe
- Zestawy
-
ON
- Ubrania
- Bielizna
- Bluzy
- Kąpielówki
- Koszule
- Kurtki i płaszcze
- Marynarki kamizeki
- Spodenki i szorty
- Spodnie
- Swetry
- T-shirt długi rękaw
- T-shirt i Polo
- KULTURA
- GADŻETY
- DZIECKO
-
DOM I WNĘTRZE
- Wnętrza
- Akcesoria dom
- Do baru
- Do biura
- Do kuchni
- Kubki kufle i kieliszki
- Lustra
- Nakrycia stołu
- Oświetlenie
- Plakaty i tablice
- Pościele, poduszki i nakrycia
- Przechowywanie
- Tekstylia
- Zegary i budziki
-
Marki
- MARKI
- Adidas
- Adriatica
- Alter Core
- Armani
- Asics
- Atlantic
- Azzaro
- Barbie
- Bburago
- Be-U
- Benetton
- Bering
- Black Plum
- Burberry
- Bvlgari
- Cacharel
- Calvin Klein
- Canon
- Carolina Herrera
- Carrera
- Casio
- Celestron
- Chanel
- Chloe
- Clinique
- Cobi
- Coloud
- Converse
- David Beckham
- Davidoff
- Delbana
- Diesel
- Dior
- DISNEY
- DKNY
- Dolce & Gabbana
- DOXA
- Dr. Martens
- Dunhill
- Ecco
- Elizabeth Arden
- Esprit
- EVC DSGN
- Festina
- Fila
- Fisher Price
- Frederique Constant
- Givenchy
- Gucci
- Guerlain
- Guess
- Hasbro
- Helena Rubinstein
- Hermes
- Hi-Tec
- Hugo Boss
- Hunter
- Iceberg
- Ingersoll
- Issey Miyake
- Jean Paul Gaultier
- Jennifer Lopez
- Jil Sander
- Jimmy Choo
- Joop!
- Juicy Couture
- Kappa
- Kenzo
- Komono
- Lacoste
- Lalique
- Lancome
- Lanvin
- Lee
- Lego
- Lorus
- Marc Jacobs
- Marshall
- Masaki Matsushima
- Matchbox
- Mattel
- Max Factor
- Max&Co
- Mc Arthur
- Mizuno
- Mont Blanc
- Moschino
- Mr. Gugu & Miss Go
- My Little Pony
- New Balance
- Nike
- Nikon
- Nina Ricci
- Ninety Eight Clothing
- Nivea
- Nixon
- Nooka
- Obaku
- Onitsuka Tiger
- Paco Rabanne
- Pentax
- Pewex
- Pierre Cardin
- Playboy
- Prada
- Puma
- Ralph Lauren
- Reebok
- Regatta
- Revlon
- Rexona
- Rider
- Salomon
- Salvatore Ferragamo
- Shelyak
- Shiseido
- Skagen
- Swarovski
- Takahashi
- Thierry Mugler
- Timberland
- Timex
- Tommy Hilfiger
- UGC
- Urbanears
- Valentino
- Vans
- Versace
- Viktor & Rolf
- Vixen
- Welly
- William Optics
- Wrangler
- Yimaida
- Yukon
- Yves Saint Laurent
-
ONA
-
Szukaj
- Losuj
DIY - zrób to sam
DIY
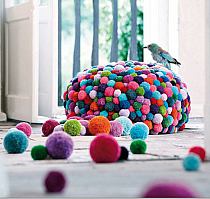
What you’ll need:
•Sand
•Elmer’s glue
•Bowl
•Plastic wrap
•Popsicle stick
•Disposable bowl
•Scissors
•Vinyl placemat
Step 1. Choose a bowl that is going to serve as the base of your sand bowl.
Step 2. Wrap the outside of the bowl in plastic wrap. Smooth out all of the wrinkles and bumps so it’s a completely even surface or you can leave a few seamed lines so it resembles the natural lines created in the sand from the waves. Push the end of the plastic wrap into the inside of the bowl.
Step 3. Find a disposable bowl you won’t mind throwing out after use.
Step 4. Place your base bowl upside down on a vinyl placemat. It allows the glue and sand to stick to it, dry on and easily peel off or wash off with a little scrubbing.
Step 5. In your disposable bowl, mix together the glue and sand using a popsicle stick until you have a consistency that is thick but that you can still pour.
Step 6. Pour the glue mix over the bowl. Don’t worry if you don’t pour it completely even, gravity will pull it down and even it out.
Step 7. After about 3 hours, pour more glue over the bowl so it creates another layer. Repeat the process again in a few more hours.
Step 8. Let the bowl sit for a full day. Avoid moving it while it’s drying or you could make marks in the glue.
Step 9. Lift the bowl, then very carefully peel the plastic wrap off.
Step 10. Use scissors to cut away any ragged edges on your sand bowl.
Źródło:
designboom.com
odwiedź stronę
MmNmNjA2ZWQ6OkQ9Ny16F0xpJRMHci1aBkd+XCNkF2o7UgZONHE+AjUyLAMsHiBMMWsVcxYcOEJIGAdeD080FQ8nam8Ydy0UJygCBxQAXDo5BVIpDGw2OjoMDUsCbB5RYQw4WyEdYBsMIwoZGX4CVQZdBSc2ZHIUNGQWOEgIAiwceX8fYRsHVAIcJwgOIyYCBAQVSGNgYVc1AUpZVSM3CwRQaxRwDAwpHUxLLD8PLwA5fRwiAA8FPHYIWg5sei1mJWdTOQZzS0VgYwxhfzlDTk8qPD4RCVVHNVphVSZyc28+AgRiEw0YeG9GOSw8d0BWFXACRDwHFhBUGSIfU0g5WC8HXVQ0DV42CA1XDDx3CGg1DzBJdCphTlIhFmIsewkjAn1gHzdON1JzFxESCmQ/DmJTF18PIhRPagQPSyh+VigtMwUQSyMcGRoJMixqGQAyeBZgYwtjbUhZZ0kHHgwzIXZucnc9fRkxcxdWBxIBDUMYDQw/czglLjFGCEpaV3RZbkFzSVJkHUYyDwQHBwR9X2xPN1gfWBkZAC4XHTkPPwhhFFZUBl5uH00taApnCFsQGkUoDAlqIyQ8WzNVbUgAIVpDPCZQc1xidyUbIEEcDSZaJn01M3MoUQMrKxsMcRltcBdsNxRDAlEdPkBAODIPRRxPBn99bRgYTl5+Bx9VTRUjGHNCfFtiXGgUfVAiVwsGNyU7cixuPionOmZVZzNwNw8CMgc9cTQACCdxAVN1CkMvM3ZEIVV1G2QjcCt7C2McCyMoDHsyLDw8DXBBCXEbChhxTEkUbwNPC3QKQGEjHxRmWG1UfTk+aR4tWlMZMyJFKAxxBEpmT34QBQEdMBwZEw8vGisXJHlmNQkoAyB0HzVDIz9BbhYYF0h0KhwyPX4nAh0cKw4FP0plbSdLK0tjVnQ/cAgqVBwNJzMCGTo0URoKKAgKYCxwfAkBCAFDUiwAfRoKfi9UZ0tPTyEdBit/E2MkMiMvEXoqVBsaKRVwRw1hH3gzCwoUKRVRMgkoF1VUDnknQwobGE8KCHoCHl5DG2VUfmJDJmcOAxovVnYYLgRuPghFEhsZRgBgC3g4NDEKBTZAKygWKVQVLDdLKXYmRSsUG1cdOAQweRM3XgceNhIoGWdXEj0UQyYhBQYANA15EjMjey8fAjMQAhoAdFdVEw==
Podobne inspiracje
385
76
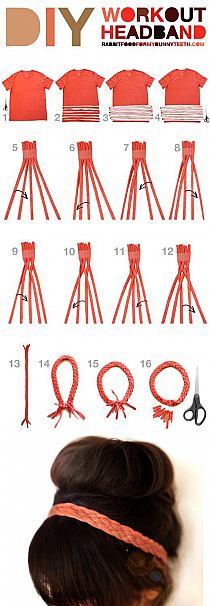
Coco 的美術館: DIY T- Shirt Redesign Ideas (part 5)
22
19
home&you - Zawieszka Swan Srebrna
154
53
1
DIY Wine barrell/wine bottle chandelier PinCookie.com
131
53
1
117
37
178
32
97
27
Unique Seating Furniture by MYK is Fun!
146
26
ZOBACZ NA JAK WIELE SPOSOBÓW MOŻNA WYKORZYSTAĆ PLASTIKO…
524
24
2
Kolorowa kreda dla dzieci | Kreatywne tworzenie
Potrzeb…
45
19
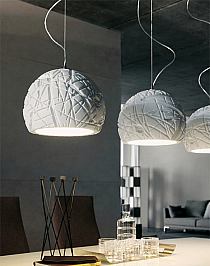
White Pendant Lights by Cattelan Italia
35
15
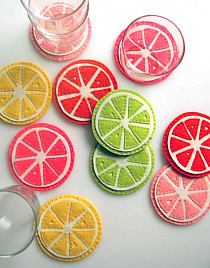
Filcowe podkładki:)
38
14
20
11
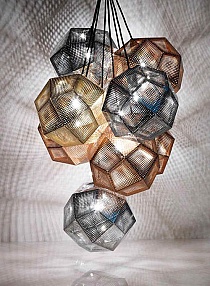
Copper and Stainless Steel Shade Pendants by Tom Dixon
18
9
2564
8
Zimna porcelana bez gotowania | Kreatywne tworzenie
Prz…
360
7
sukienka
7
6
Ronit Baranga
1012
6
więcej tutaj: http://tosienosi.blogspot.com/2012/07/luc…
345
6
głodny jestem
3364
6
Składniki na 3szt:
na ciasto:
1 i 3/4 szklanki mąki
3…
320
5
świecznik
7
5
Potholder Rug Making Workshop | crispina
8
5
It's a house - en av Sveriges största inredningsbl…
14
4
2
763
4
1
DIY Nice Modular Rose DIY Projects | UsefulDIY.com
17
4
SLIDING LID SAND BOX @ in-the-cornerin-the-corner
211
4
Stary,co ty robisz w tej wodzie?
1853
4
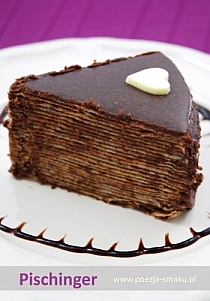
PISCHINGER
Składniki:
2 opakowania andrutów
1 margar…
153
3
Stwórz własną książkę!
2011
3
DIY Magic bottles—fill with distilled water, glycerin d…
1
3
889
3
DIY Lovely Thick Bracelet DIY Projects | UsefulDIY.com
783
3
694
3
Mleko skondensowane domowej roboty
Składniki:
1/4 szk…
50
3
piórnik
44
3
DIY Triangular Chain Leather Bracelet DIY Projects | Us…
W 10 innych kolekcjach

