-
Inspiracje
- Najnowsze
- Najpopularniejsze
- Zaskocz mnie
- Obserwowane
- MAGazyn
- Moda damska
- DIY - zrób to sam
- Kuchnia
- Uroda
- Wnętrza
- Humor
- Ogród
- Ślub
- Architektura
- Biżuteria
- Design
- Dziecko
- Film
- Fotografia
- Gadżety
- Historia
- Hobby
- Inne
- Książka
- Moda męska
- Muzyka
- Nauka i natura
- Plakaty i obrazy
- Podróże i miejsca
- Samochody i motocykle
- Sport i fitness
- Święta i uroczystości
- Tatuaż
- Zwierzęta
- Partnerzy
- KONKURS
-
Zakupy
-
ONA
- Ubrania
- Bielizna
- Bluzki
- Bluzy
- Dresy damskie
- Kombinezony
- Koszule
- Koszulki
- Kurtki
- Płaszcze
- Spodnie i leginsy
- Spodnie jeans
- Spódnice
- Stroje kąpielowe
- Sukienki i tuniki
- Swetry
- Szorty
- Zestawy
- Żakiety i kamizelki
- Buty
- Baleriny
- Botki
- Czółenka
- Espadryle
- Glany
- Japonki
- Kalosze
- Klapki
- Koturny
- Kowbojki
- Kozaki
- Obuwie Domowe
- Półbuty
- Sandały
- Sportowe i lifestyle
- Szpilki
- Tenisówki i Trampki
- Trapery i trekkingi
- Dodatki
- Bransoletki i zawieszki
- Breloki
- Czapki i kapelusze
- Etui
- Kolczyki, nausznice
- Kołnierzyki
- Kosmetyczki
- Naszyjniki, kolie i zawieszki
- Okulary
- Ozdoby do włosów
- Parasole
- Paski
- Pierścionki
- Plecaki
- Portfele
- Rękawiczki
- Skarpety
- Szaliki i chusty
- Torby i torebki
- Walizki
- Zegarki
- Zestawy biżuterii
- Zdrowie i uroda
- Akcesoria kosmetyczne
- Balsamy
- Bazy i podkłady
- Cienie do oczu
- Dezodoranty
- Higiena jamy ustnej
- Korektory
- Kredki
- Kremy i serum
- Lakiery
- Manicure i pedicure
- Maseczki
- Odżywki
- Peeling
- Perfumy i wody perfumowane
- Pielęgnacja po opalaniu
- Płyny żele i mydła
- Pomadki i błyszczyki
- Pudry
- Róże
- Stylizacja włosów
- Szampony
- Toniki i demakijaż
- Tusze
- Wody toaletowe
- Zestawy
-
ON
- Ubrania
- Bielizna
- Bluzy
- Kąpielówki
- Koszule
- Kurtki i płaszcze
- Marynarki kamizeki
- Spodenki i szorty
- Spodnie
- Swetry
- T-shirt długi rękaw
- T-shirt i Polo
- KULTURA
- GADŻETY
- DZIECKO
-
DOM I WNĘTRZE
- Wnętrza
- Akcesoria dom
- Do baru
- Do biura
- Do kuchni
- Kubki kufle i kieliszki
- Lustra
- Nakrycia stołu
- Oświetlenie
- Plakaty i tablice
- Pościele, poduszki i nakrycia
- Przechowywanie
- Tekstylia
- Zegary i budziki
-
Marki
- MARKI
- Adidas
- Adriatica
- Alter Core
- Armani
- Asics
- Atlantic
- Azzaro
- Barbie
- Bburago
- Be-U
- Benetton
- Bering
- Black Plum
- Burberry
- Bvlgari
- Cacharel
- Calvin Klein
- Canon
- Carolina Herrera
- Carrera
- Casio
- Celestron
- Chanel
- Chloe
- Clinique
- Cobi
- Coloud
- Converse
- David Beckham
- Davidoff
- Delbana
- Diesel
- Dior
- DISNEY
- DKNY
- Dolce & Gabbana
- DOXA
- Dr. Martens
- Dunhill
- Ecco
- Elizabeth Arden
- Esprit
- EVC DSGN
- Festina
- Fila
- Fisher Price
- Frederique Constant
- Givenchy
- Gucci
- Guerlain
- Guess
- Hasbro
- Helena Rubinstein
- Hermes
- Hi-Tec
- Hugo Boss
- Hunter
- Iceberg
- Ingersoll
- Issey Miyake
- Jean Paul Gaultier
- Jennifer Lopez
- Jil Sander
- Jimmy Choo
- Joop!
- Juicy Couture
- Kappa
- Kenzo
- Komono
- Lacoste
- Lalique
- Lancome
- Lanvin
- Lee
- Lego
- Lorus
- Marc Jacobs
- Marshall
- Masaki Matsushima
- Matchbox
- Mattel
- Max Factor
- Max&Co
- Mc Arthur
- Mizuno
- Mont Blanc
- Moschino
- Mr. Gugu & Miss Go
- My Little Pony
- New Balance
- Nike
- Nikon
- Nina Ricci
- Ninety Eight Clothing
- Nivea
- Nixon
- Nooka
- Obaku
- Onitsuka Tiger
- Paco Rabanne
- Pentax
- Pewex
- Pierre Cardin
- Playboy
- Prada
- Puma
- Ralph Lauren
- Reebok
- Regatta
- Revlon
- Rexona
- Rider
- Salomon
- Salvatore Ferragamo
- Shelyak
- Shiseido
- Skagen
- Swarovski
- Takahashi
- Thierry Mugler
- Timberland
- Timex
- Tommy Hilfiger
- UGC
- Urbanears
- Valentino
- Vans
- Versace
- Viktor & Rolf
- Vixen
- Welly
- William Optics
- Wrangler
- Yimaida
- Yukon
- Yves Saint Laurent
-
ONA
-
Szukaj
- Losuj
Kuchnia
Pieczywo
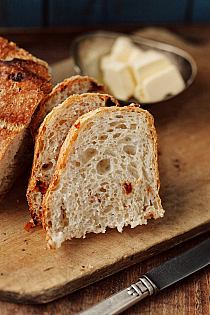
http://www.blessthismessplease.com/2012/08/rustic-italian-bread.html
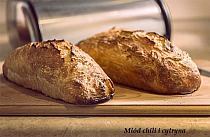
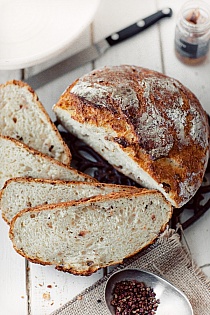
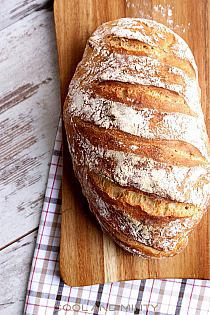
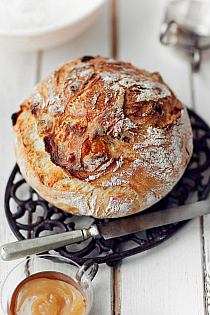
Rustic Italian Bread
Recipe from The America’s Test Kitchen Family Baking Book
Makes one very large loaf
For the sponge:
2 cups bread flour
1 cup warm water
1/4 tsp instant yeast
For the dough:
3-3 1/2 cups bread flour
1 tsp instant yeast
1 1/4 cups warm water
2 tsp salt
To make the sponge:
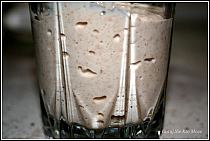
Mix the flour, water, and yeast together in a medium bowl until it resembles dough. Cover the top of the bowl with plastic wrap and let it sit at room temperature for 6 to 24 hours.
To make the dough:
Add 3 cups of the flour and yeast to the bowl of your stand mixer. With the dough hook attached, turn the mixer on to low and slowly add the water while the mixer is running. Let this mix for 2 minutes until the dough starts to come together. Lift the head of your stand mixer and place a piece of plastic wrap tightly over the bowl. Let the dough rest for 20 minutes.
After the 20 minute rest, remove the plastic wrap and add your sponge and salt. Mix on medium low speed for 8 minutes. After 4 minutes, if the dough is sticking to the side of the bowl add the last 1/2 cup of flour a little at a time until the dough stops sticking to the edges of the bowl but is still sticking to the bottom (you do want it to stick to the bottom). Turn the dough out onto a lightly floured surface and form into a smooth round ball.
Place the dough in a large, lightly oiled bowl, and cover tightly with plastic wrap. Let the dough rise in a warm spot until doubled, about an hour.
After the dough has doubled, remove the plastic wrap. Using a large spatula gently fold the dough into itself by pulling the edge of the dough into the middle. Do this a few times all around the edge of the bowl. Cover the bowl and let the dough rise for 30 minutes..
Repeat the previous step after the 30 minutes are up and then let it rise for a second 30 minutes.
After the second 30 minutes of rising, it’s time to form the loaf. Remove the dough from the bowl and gently press it into a 10-inch square without tearing it. Fold each corner into the middle and then gently roll the dough into a tornado shape. Place the dough, seam down, on a rimless baking sheet (or one that is upside-down) that is lined with parchment paper. Gently tuck the dough into place on the parchment. You should end up with a long thin loaf that is 16 inches long. Lightly mist the dough with cooking oil and then loosely cover with plastic wrap. Let the dough rise in a warm place until doubled, 1 to 1 1/2 hours.
While the dough is rising, prep the oven and your baking stone. Preheat the oven to 500 degrees. Let the baking stone heat for 30 minutes (but not longer than an hour).
When the dough has doubled, score the top with a razor blade, diagonally and 1/2 inch deep and spray lightly with water. CAREFULLY slide the loaf and the parchment onto the hot baking stone in the oven and bake for 10 minutes.
After 10 minutes reduce the oven temperature to 400 degrees. Bake for 30 to 35 more minutes until the crust is a deep golden brown. Let the loaf cool on a wire rack until it is room temperature before serving (about 2 hours cooling time).
Notes:
The bread flour makes for a chewier loaf, but in a pinch I’ve used all-purpose flour and the results were still worth the effort.
The longer the sponge sits the more developed the flavor will be.Try to let it set for 24 hours if you can.
Don’t skip on the initial 20 minute rest and the two light in-bowl “kneading” with the spatula – these help the gluten to develop and are what make the bread chewy on the outside while being fluffy in the middle.
I was brave enough to try such an in-depth recipe because The America’s Test Kitchen Family Baking Book has tons of pictures of all the steps. It shows you what the sponge should look like, picture tutorial on shaping the loaf, etc. It’s a wonderful book that I recommend highly.
MA==
Podobne inspiracje
3
4
Food and Cook by trotamundos » Pan con webos fritos, el…
682
3
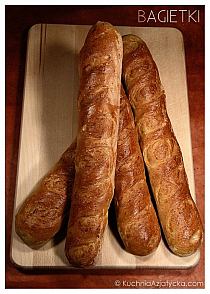
Bagietki domowej roboty
SKŁADNIKI:
300 g mąki…
3
3
Bułki do hot dogów/hamburgerów - idealna przekąska na .…
2080
2
Najlepsze są jeszcze ciepłe, chociaż wystudzone tego sa…
590
2
BULKI CZOSNKOWE Z TYMIANKIEM.
SKŁADNIKI:
450 g mą…
19
2
Chleb na maślance
Receptura:
250 g mąki pszennej
250 g…
32
2
Bezglutenowy chleb życia | Przepisy na chleb
1329
2
Czosnkowe chlebki Naan
Składniki na 5-6 chlebków:
* 3…
39
2
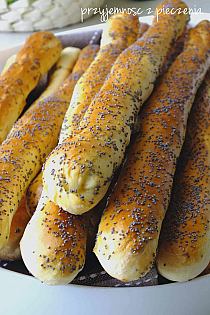
Przyjemność z pieczenia: Paluchy drożdżowe z makiem
htt…
2072
1
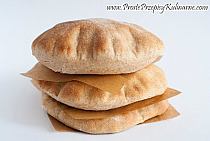
Dziś przedstawiam przepis na chlebki pita. Chlebki pięk…
263
1
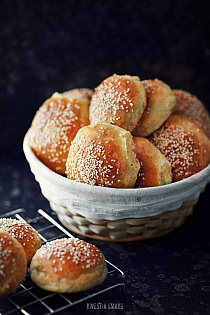
Bułeczki hamburgerowe z sezamem - Przepis
244
1
Bułki ziołowe - przepis
687
1
Chleb z grubą i chrupiącą skórką - Przepis
715
1
Błyskawiczny chleb z chrupiącą skórką
57
bez wyrabia…
226
1
:) Dietetyczne pełnoziarniste pieczone mini pączki
(na…
67
1
Domowe bułeczki orkiszowe,ciepła bułka na śniadanie/prz…
1
1
Słodkie zajączki drożdżowe (8 sztuk):
375 g mąki, 30 g…
67
1
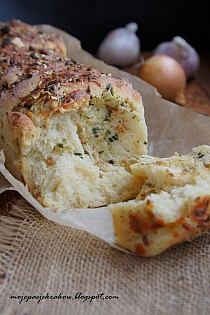
Moje Wypieki | Bułeczki czosnkowe z pietruszką
W 5 innych kolekcjach


