-
Inspiracje
- Najnowsze
- Najpopularniejsze
- Zaskocz mnie
- Obserwowane
- MAGazyn
- Moda damska
- DIY - zrób to sam
- Kuchnia
- Uroda
- Wnętrza
- Humor
- Ogród
- Ślub
- Architektura
- Biżuteria
- Design
- Dziecko
- Film
- Fotografia
- Gadżety
- Historia
- Hobby
- Inne
- Książka
- Moda męska
- Muzyka
- Nauka i natura
- Plakaty i obrazy
- Podróże i miejsca
- Samochody i motocykle
- Sport i fitness
- Święta i uroczystości
- Tatuaż
- Zwierzęta
- Partnerzy
- KONKURS
-
Zakupy
-
ONA
- Ubrania
- Bielizna
- Bluzki
- Bluzy
- Dresy damskie
- Kombinezony
- Koszule
- Koszulki
- Kurtki
- Płaszcze
- Spodnie i leginsy
- Spodnie jeans
- Spódnice
- Stroje kąpielowe
- Sukienki i tuniki
- Swetry
- Szorty
- Zestawy
- Żakiety i kamizelki
- Buty
- Baleriny
- Botki
- Czółenka
- Espadryle
- Glany
- Japonki
- Kalosze
- Klapki
- Koturny
- Kowbojki
- Kozaki
- Obuwie Domowe
- Półbuty
- Sandały
- Sportowe i lifestyle
- Szpilki
- Tenisówki i Trampki
- Trapery i trekkingi
- Dodatki
- Bransoletki i zawieszki
- Breloki
- Czapki i kapelusze
- Etui
- Kolczyki, nausznice
- Kołnierzyki
- Kosmetyczki
- Naszyjniki, kolie i zawieszki
- Okulary
- Ozdoby do włosów
- Parasole
- Paski
- Pierścionki
- Plecaki
- Portfele
- Rękawiczki
- Skarpety
- Szaliki i chusty
- Torby i torebki
- Walizki
- Zegarki
- Zestawy biżuterii
- Zdrowie i uroda
- Akcesoria kosmetyczne
- Balsamy
- Bazy i podkłady
- Cienie do oczu
- Dezodoranty
- Higiena jamy ustnej
- Korektory
- Kredki
- Kremy i serum
- Lakiery
- Manicure i pedicure
- Maseczki
- Odżywki
- Peeling
- Perfumy i wody perfumowane
- Pielęgnacja po opalaniu
- Płyny żele i mydła
- Pomadki i błyszczyki
- Pudry
- Róże
- Stylizacja włosów
- Szampony
- Toniki i demakijaż
- Tusze
- Wody toaletowe
- Zestawy
-
ON
- Ubrania
- Bielizna
- Bluzy
- Kąpielówki
- Koszule
- Kurtki i płaszcze
- Marynarki kamizeki
- Spodenki i szorty
- Spodnie
- Swetry
- T-shirt długi rękaw
- T-shirt i Polo
- KULTURA
- GADŻETY
- DZIECKO
-
DOM I WNĘTRZE
- Wnętrza
- Akcesoria dom
- Do baru
- Do biura
- Do kuchni
- Kubki kufle i kieliszki
- Lustra
- Nakrycia stołu
- Oświetlenie
- Plakaty i tablice
- Pościele, poduszki i nakrycia
- Przechowywanie
- Tekstylia
- Zegary i budziki
-
Marki
- MARKI
- Adidas
- Adriatica
- Alter Core
- Armani
- Asics
- Atlantic
- Azzaro
- Barbie
- Bburago
- Be-U
- Benetton
- Bering
- Black Plum
- Burberry
- Bvlgari
- Cacharel
- Calvin Klein
- Canon
- Carolina Herrera
- Carrera
- Casio
- Celestron
- Chanel
- Chloe
- Clinique
- Cobi
- Coloud
- Converse
- David Beckham
- Davidoff
- Delbana
- Diesel
- Dior
- DISNEY
- DKNY
- Dolce & Gabbana
- DOXA
- Dr. Martens
- Dunhill
- Ecco
- Elizabeth Arden
- Esprit
- EVC DSGN
- Festina
- Fila
- Fisher Price
- Frederique Constant
- Givenchy
- Gucci
- Guerlain
- Guess
- Hasbro
- Helena Rubinstein
- Hermes
- Hi-Tec
- Hugo Boss
- Hunter
- Iceberg
- Ingersoll
- Issey Miyake
- Jean Paul Gaultier
- Jennifer Lopez
- Jil Sander
- Jimmy Choo
- Joop!
- Juicy Couture
- Kappa
- Kenzo
- Komono
- Lacoste
- Lalique
- Lancome
- Lanvin
- Lee
- Lego
- Lorus
- Marc Jacobs
- Marshall
- Masaki Matsushima
- Matchbox
- Mattel
- Max Factor
- Max&Co
- Mc Arthur
- Mizuno
- Mont Blanc
- Moschino
- Mr. Gugu & Miss Go
- My Little Pony
- New Balance
- Nike
- Nikon
- Nina Ricci
- Ninety Eight Clothing
- Nivea
- Nixon
- Nooka
- Obaku
- Onitsuka Tiger
- Paco Rabanne
- Pentax
- Pewex
- Pierre Cardin
- Playboy
- Prada
- Puma
- Ralph Lauren
- Reebok
- Regatta
- Revlon
- Rexona
- Rider
- Salomon
- Salvatore Ferragamo
- Shelyak
- Shiseido
- Skagen
- Swarovski
- Takahashi
- Thierry Mugler
- Timberland
- Timex
- Tommy Hilfiger
- UGC
- Urbanears
- Valentino
- Vans
- Versace
- Viktor & Rolf
- Vixen
- Welly
- William Optics
- Wrangler
- Yimaida
- Yukon
- Yves Saint Laurent
-
ONA
-
Szukaj
- Losuj
DIY - zrób to sam
DIY na sciane
http://www.anniefranceschi.com/anniemade/845
Supplies
For the doormat base -
1 piece of Tile Backerboard cut to 20x30" (or your desired doormat size) - the people at Lowe's cut me a piece from a damaged larger piece so the part I used only cost $2.00
For the design and transfer -
This anniemade PDF template for the "hi there" design which you'll print as 11x17" (or on smaller sheets taped together to make an 11x17")
1 dark crayon
1 black sharpie
1 pen
A few pieces of painter's tape
For the mosaic tiling of it all -
4 6x6" Black Ceramic Tiles
12 6x6" White Ceramic Tiles
A hammer
A box lid or other space for crushing tile in
1 tub of Ready to Use White Unsanded grout
1 tub of Ready to Use White Sanded grout
Trowel or knife to spread the grout with
Tile and grout sponge
Tile and grout sealer
Directions
To begin, set up your workspace in a well ventilated area. We worked outside on a card table.
DESIGN TRANSFER: Set your tile backerboard out and ready to go. Using your dark crayon, color the back of the printed "hi there" design copiously- covering the entire back of the words in dark crayon. Turn your design over and tape in place on your backerboard exactly where you'll want your design to be on the doormat. Using a pen, press down hard on the outlines of the letters and go over both words. This should push the crayon to the board itself, giving you a faint outline. Remove your paper and outline your faint markings with a sharpie so it's easier to see. Doesn't matter if you have to redraw a line or two - you won't see this part later.
THE FIRST TILE - BLACK: Smash up your black tile into tiny pieces. We used a hammer along with a screwdriver. Using a plastic knife, spread a generous amount of Unsanded grout on the back of your pieces and begin to fit them into the words you've just outlined in sharpie.
THE SECOND TILE - WHITE: Smash up your white tile into about 3-4 large pieces. Using a larger trowel or knife, spread out plenty of unsanded grout onto your backerboard and begin to place your tile. I recommend using the rounded edges around the edge of the doormat wherever possible. Once your edges are completed, work your way into the center and around the letters by smashing the white tile into smaller pieces.
GROUT TIME: Allow your tiles to set overnight before doing this next step. When ready, use a trowel or knife to spread the Sanded grout into all the crevasses left by the tile. After we completed our board, I went ahead and sponged a lot of the excess off but I've read it can be best to wait. Some of our grout sunk and left a few holes, but I like how it turned out.
SEAL THAT BABY: We're lucky in that our doormat doesn't reach the rain but we are still going to seal it with your standard tile and grout sealer to help protect it from the elements.
MA==
Podobne inspiracje
139
38
12
13
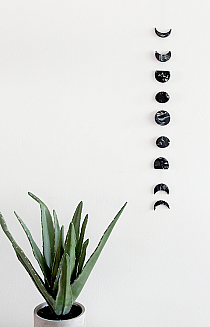
diy marble moon phase wall hanging
http://www.almostmak…
14
9
house update: DIY built-in shelving
http://www.smitten…
1
3
http://monsterscircus.com/2015/04/24/diy-leaf-art/
9
2
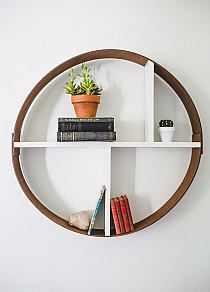
http://www.abeautifulmess.com/2014/10/make-a-hoop-shelf…
3
2
Fotografie na metalowych linkach przymocowane magnesika…
7
2
165
1
Friday's Fantastic Finds - Inspiration For Moms
8
1
1
1
1
1
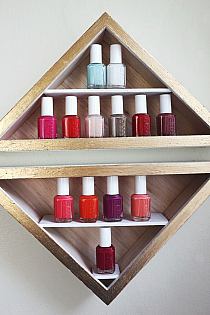
Make Your Own Nail Polish Shelves
http://www.abeautifu…
25
1
1
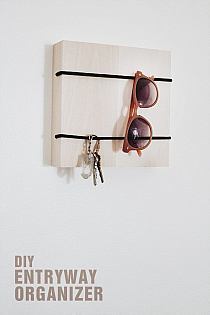
http://www.almostmakesperfect.com/2014/05/14/diy-entryw…
1
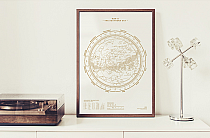
Gold Leaf Map Art
http://sugarandcloth.com/2013/08/giv…
3
1
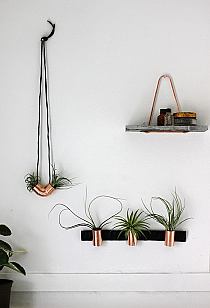
Minimal Copper Airplant Holders
http://www.poppytalk.…
1
http://www.stellavie.com/home/en/products/print-silkscr…
1
391
1
7
1
381
1
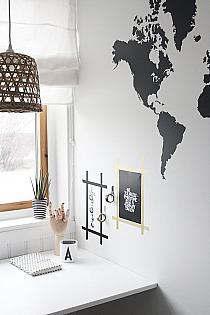
Mapa na ścianie
3
1
rzyklejone taśmą dekoracyjną
27
1
1
1
DIY Love Note Wall Art
http://themerrythought.com/diy/…
1
1
11. Magazine Rack
http://atilio.blogg.se/2015/februar…
1
http://atilio.blogg.se/2015/march/diy-tavla-med-pressad…
1
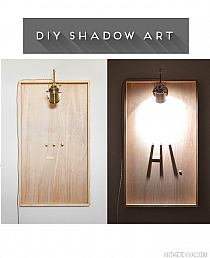
http://www.vintagerevivals.com/2015/03/diy-shadow-art-v…
23
1
"Banana leaf"
Obrazy proponowane tutaj są wspaniałym po…
195
Zdjęcie na drewnie
404
804
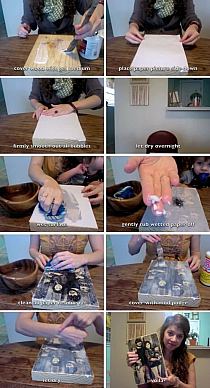
PRZENIEŚ ULUBIONE ZDJĘCIE NA DESKĘ - SUPER PATENT NA UT…
1
551
"Kopiowanie" brazka z gazety

